
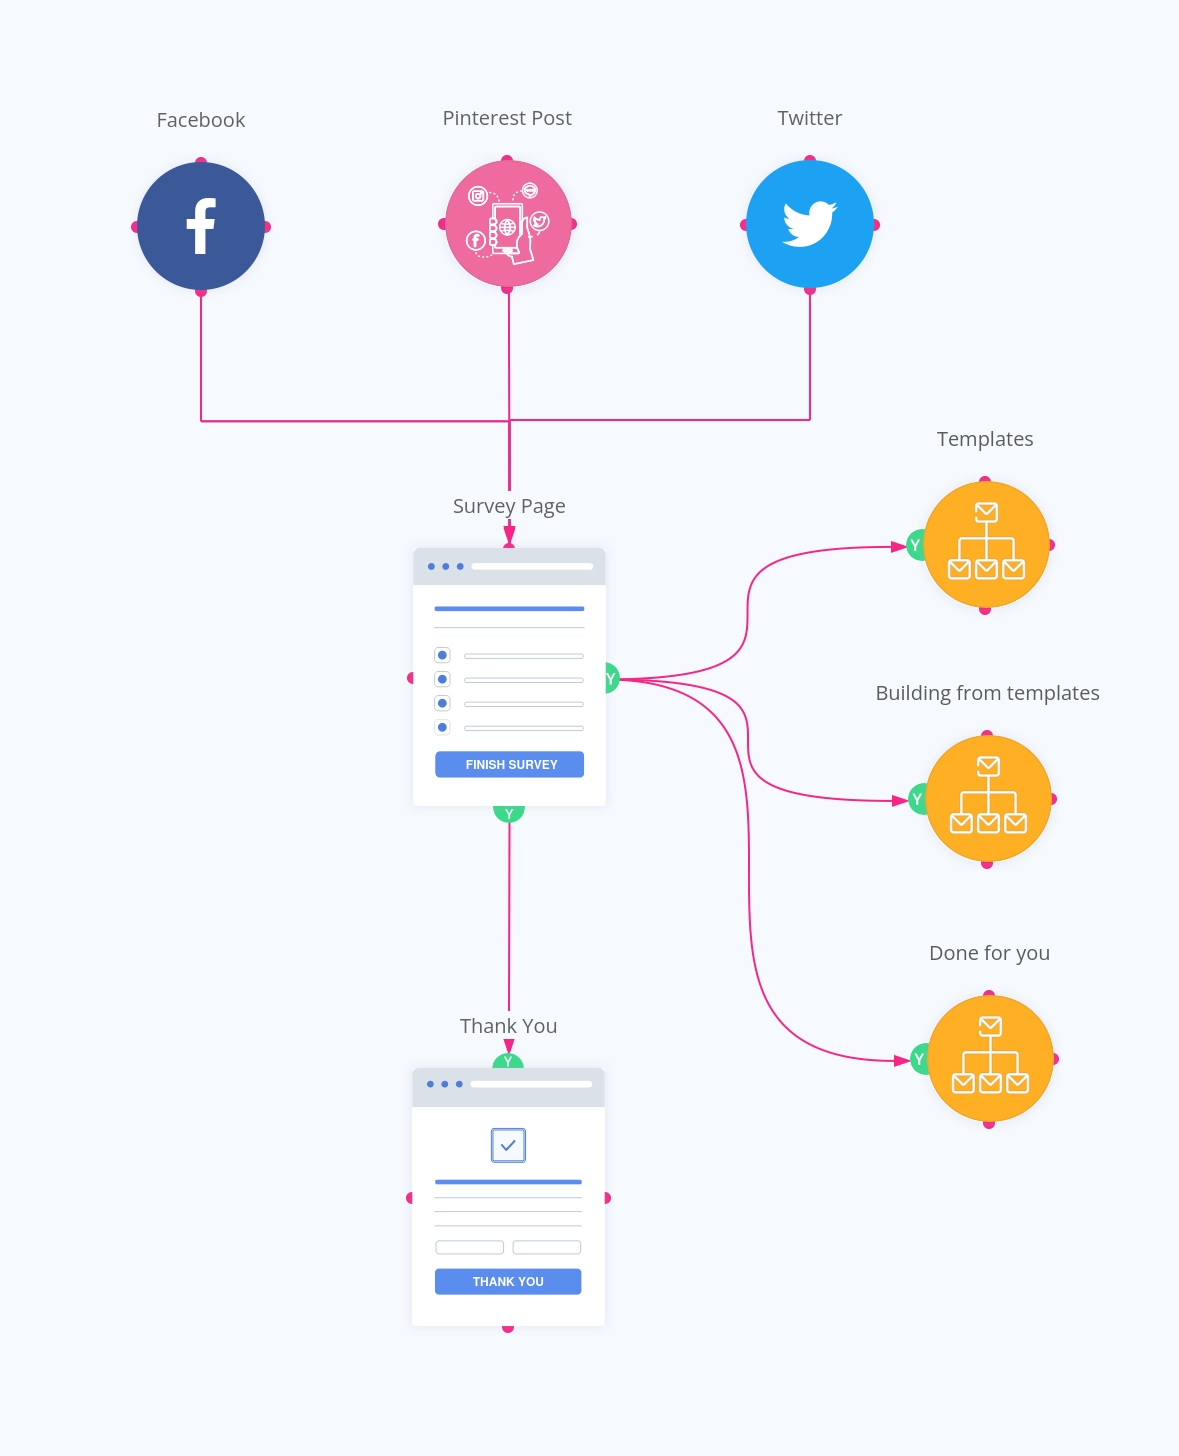
Sometimes, the most effective way to learn more about your visitors is just… to ask them! It can seem weird, but believe me, it works like a charm. So the big deal here is to ask your visitors what are their situation and pain points, and then map them in a FluentCRM list. Doing this, you’ll be able to contact them later with the right message, and the right offer, that meets perfectly their needs.
In this article, we have seen how to build a complete Survey Funnel. We will see in this one how to build it with a simple example, thanks to Fluent Forms Pro and FluentCRM.
In this practical article, I have different 3 different personas, so 3 products and services to sell :
- For freelancers, this is my entry price offer. I have templates and swipe files for them
- For small businesses, consulting and done-for-you from templates
- For businesses who are looking for done-for-you services, from scratch, fully handmade, and customized
Let’s see how we can create a survey funnel to know their pain points, what they need, and how I can record these answers in FluentCRM, to then send them an appropriate message.
What is Fluent Forms?
Fluent Forms is a powerful form builder for WordPress, that will allow you to create forms like contact forms, opt-in forms, signup forms, and… survey funnels. Sure, Fluent Forms has a “Survey” feature, but that’s not what I will cover today.
What is FluentCRM?
FluentCRM is an email marketing WordPress plugin that will allow you to manage email campaigns for your subscribers, depending on their personal information.
Let’s build this Survey Funnel
For this exercise, I assume you already have Fluent Forms Pro installed on your WordPress website.
Please notice that we absolutely need the Pro version of Fluent Forms to unlock the FluentCRM integrations.
1. Install the FluentCRM plugin
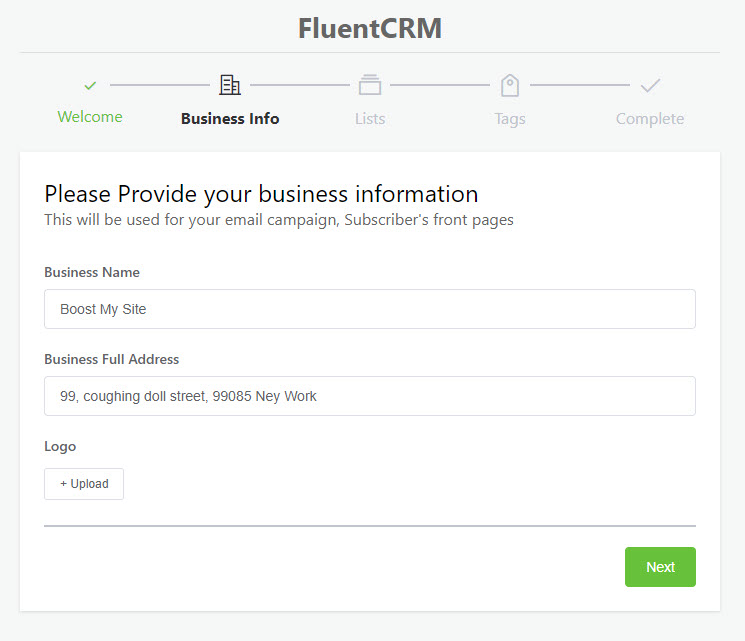
The FluentCRM plugin installation is really interesting for 2 different reasons :
- You have to enter your Business Info (REALLY important to not be considered as spam)
- You can create some lists and tags directly
In our case, I create 3 different lists, for my 3 different offers :
- “Templates”: the subscribers on this list are mainly freelancers, who will have a pretty low budget
- “Building from template”: these subscribers have more budget, but not enough for a complete handmade job.
- “Done-for-you”: this list is for subscribers that have a comfortable budget
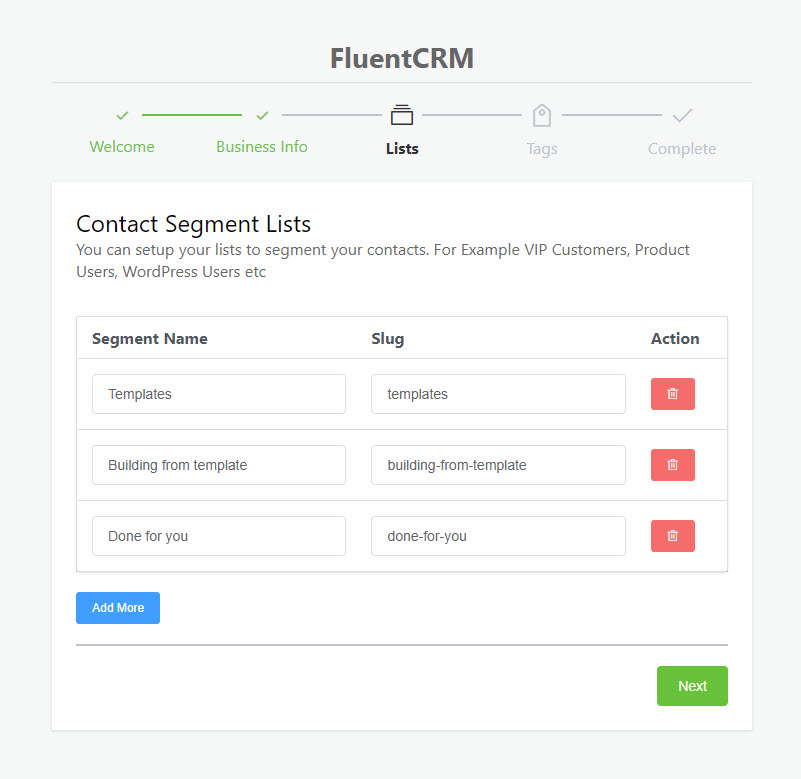
You can notice that my lists do not describe my personas, but my offers. That’s because a freelancer can have a comfortable budget, and a mid-sized business can be on a budget because they met difficulties in the last 3 months. So my strategy here is to place people in lists that reflect my offers.
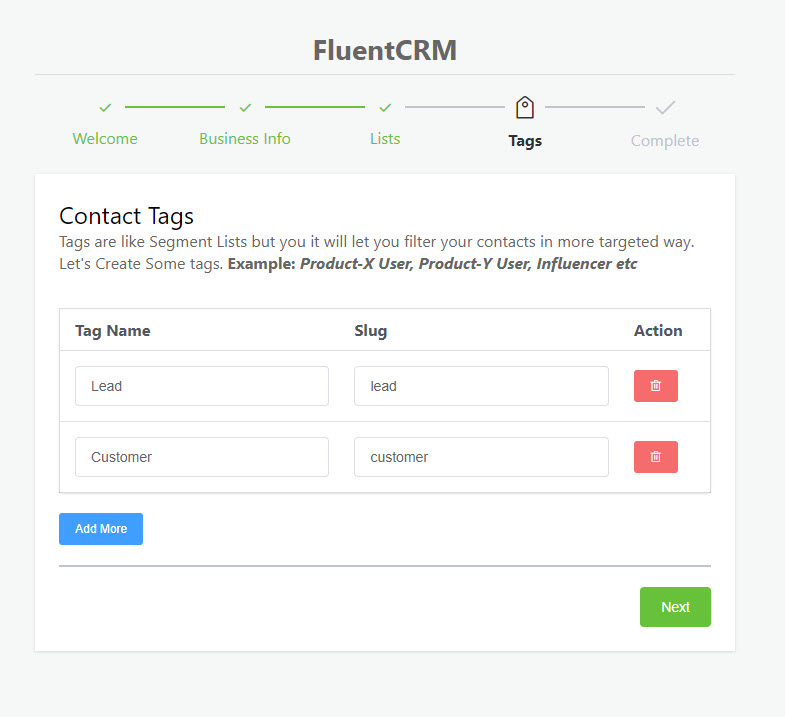
I also create Tags, corresponding to the customer journey step. Note that it is really simple in this example, we can have much more complex tags management depending on various steps and conditions in the customer journey.
2. Create a new form in Fluent Forms
It’s time now to create of form. It is important to really think about the questions you’ll ask your visitors. I will personally create simple questions only to illustrate a simple example, but you need to brainstorm what your business needs to know from your visitors to effectively create a better connection with your visitors and leads. That will drive your business to success faster.
Think to ask your visitors about :
- Their pain points
- Their budget (it will drive the list)
- Their business info
- Ideally, place a form step before asking the name and email address
- Ask for their name and email address (mandatory)
- Feel free to ask other precious information for your business
- Don’t forget to add a Captcha (reCaptcha or hCaptcha)
So let’s create our form by clicking “New Blank Form”.
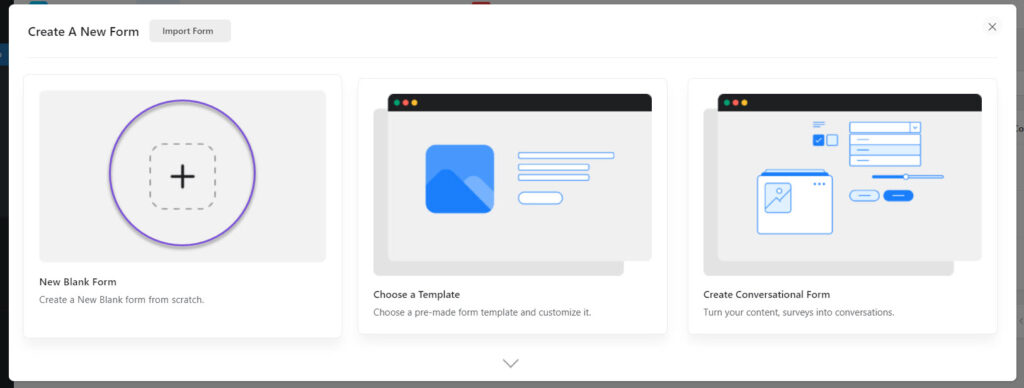
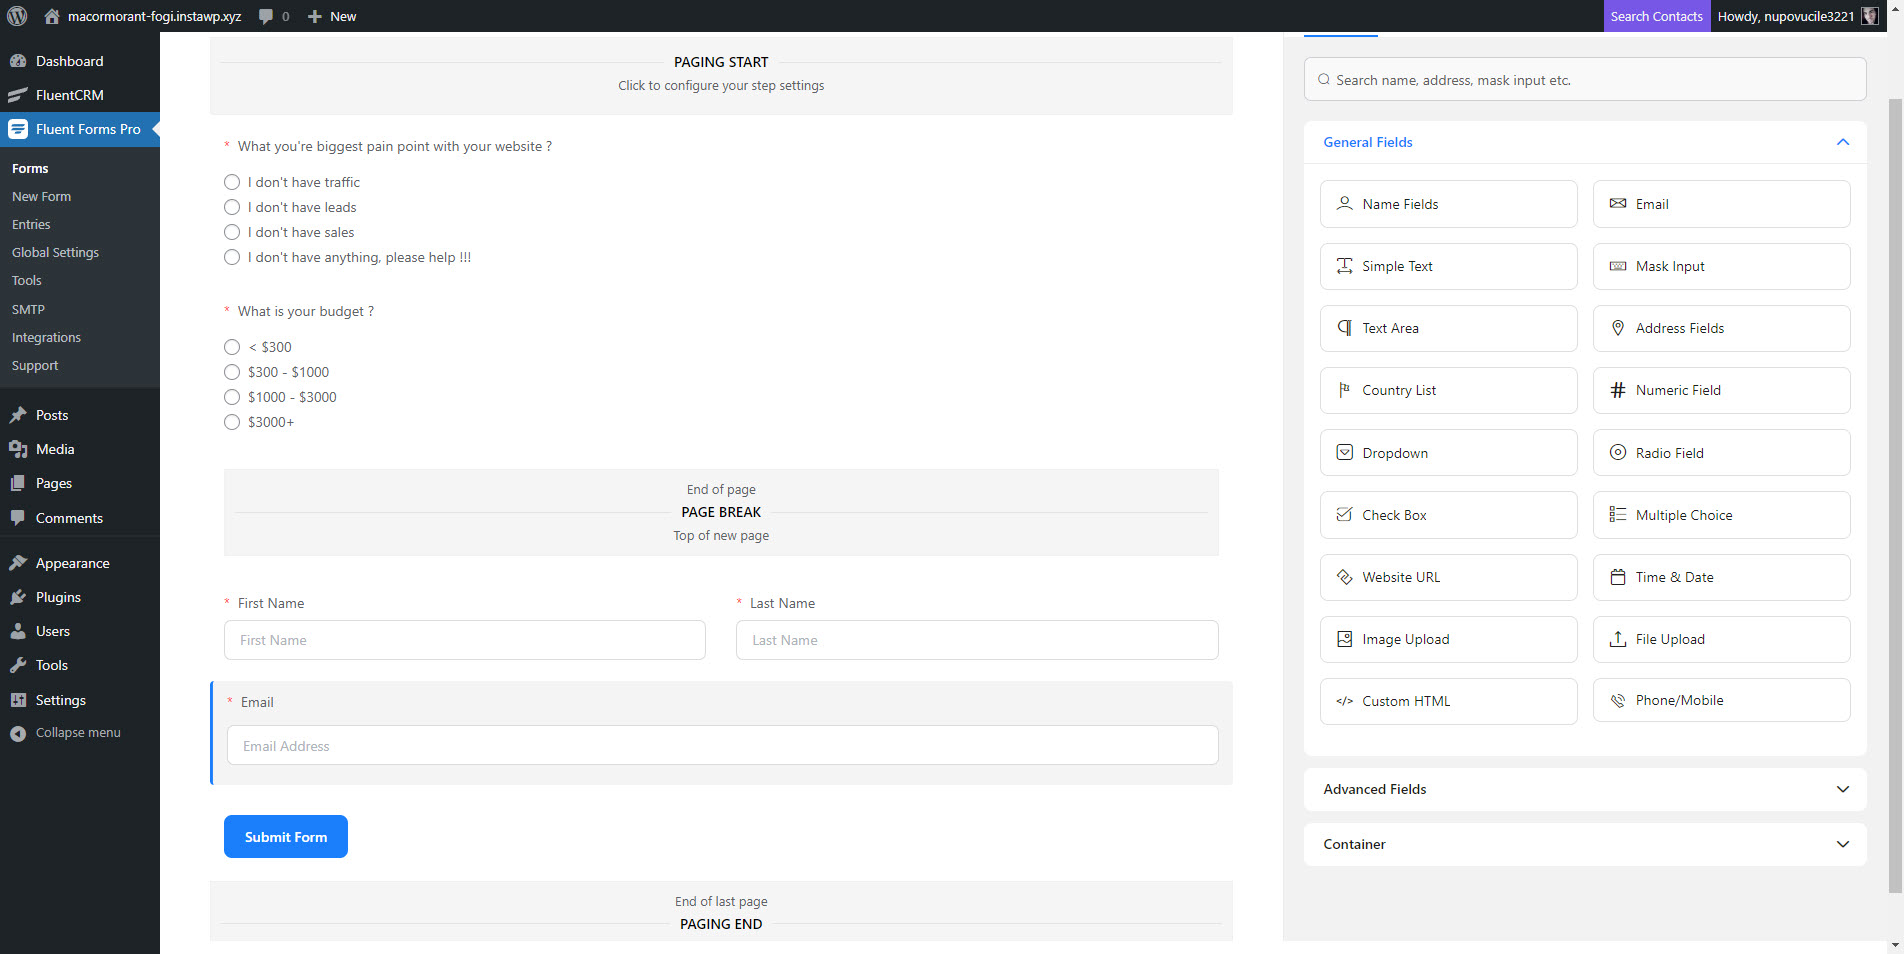
Here is the canvas. On this pretty user-friendly interface :
- Enter the name of your form
- You have different form fields available on the right
- You have to drop them on the canvas
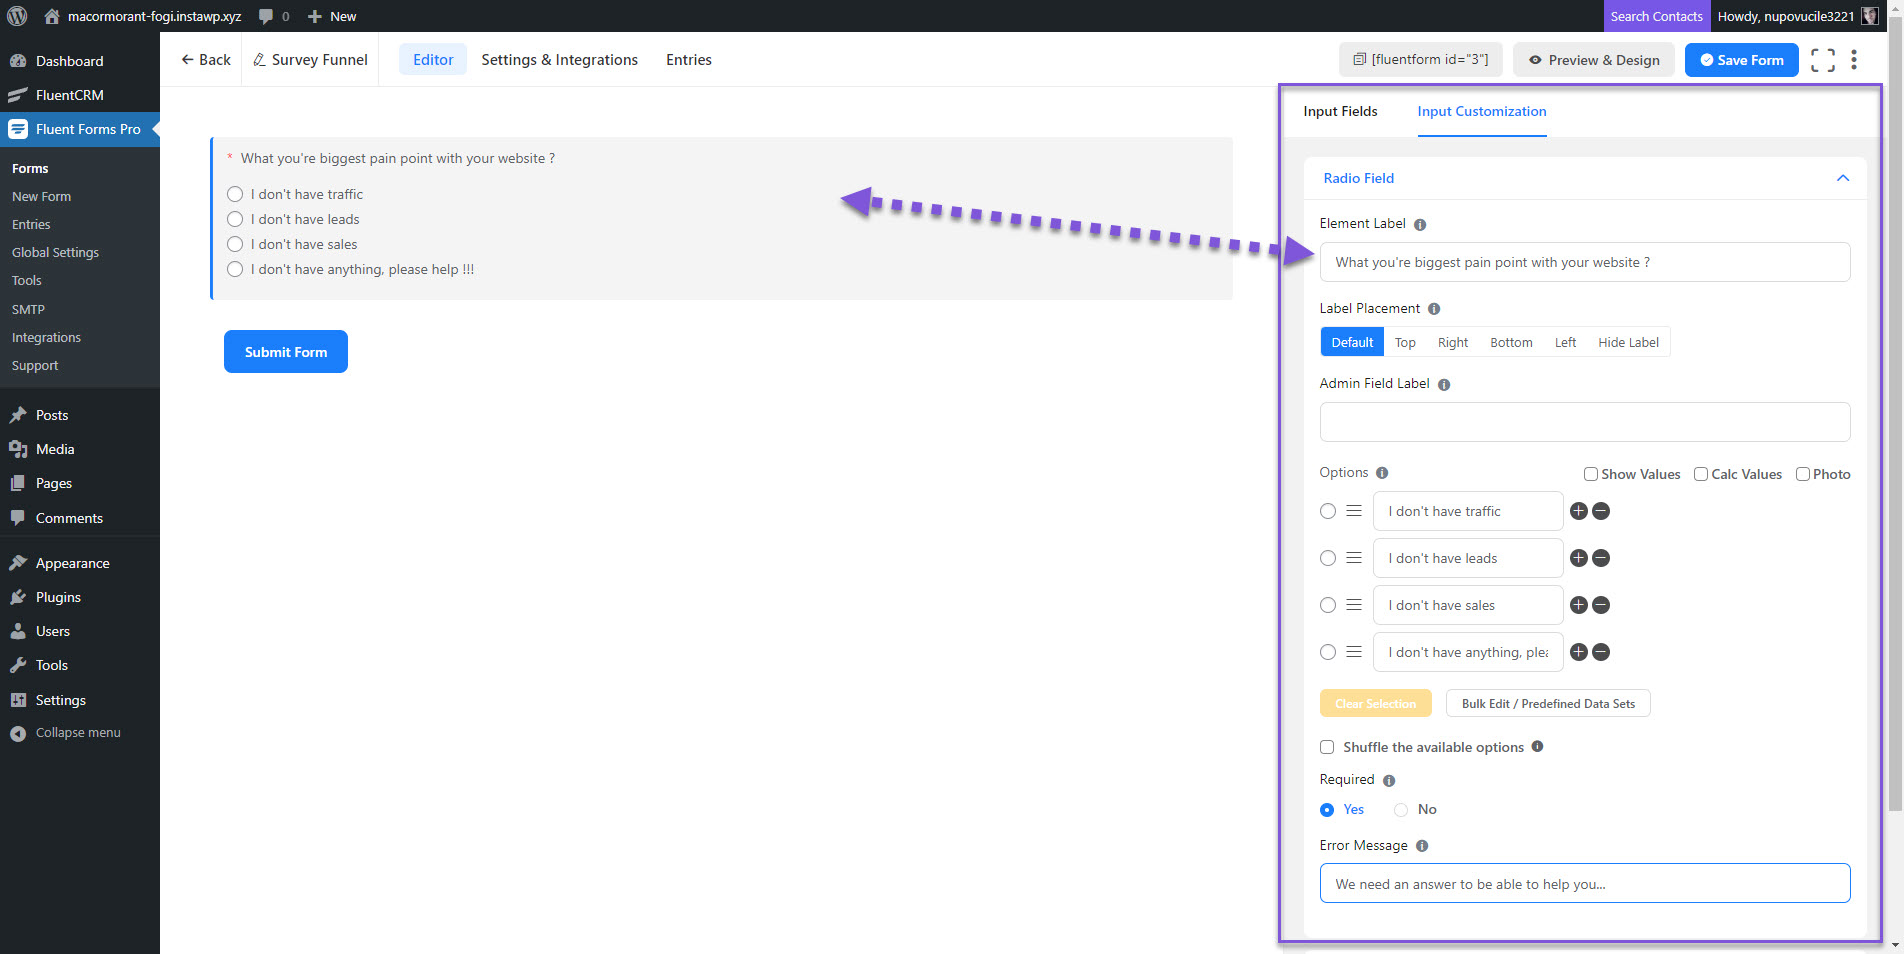
So I create my first field, which is a radio field, to ask the pain points of the visitors. You can see the details and settings of the field on the right. Of course, I make it required. You’ll see that later, but it’s not a good idea to place special characters in my labels…
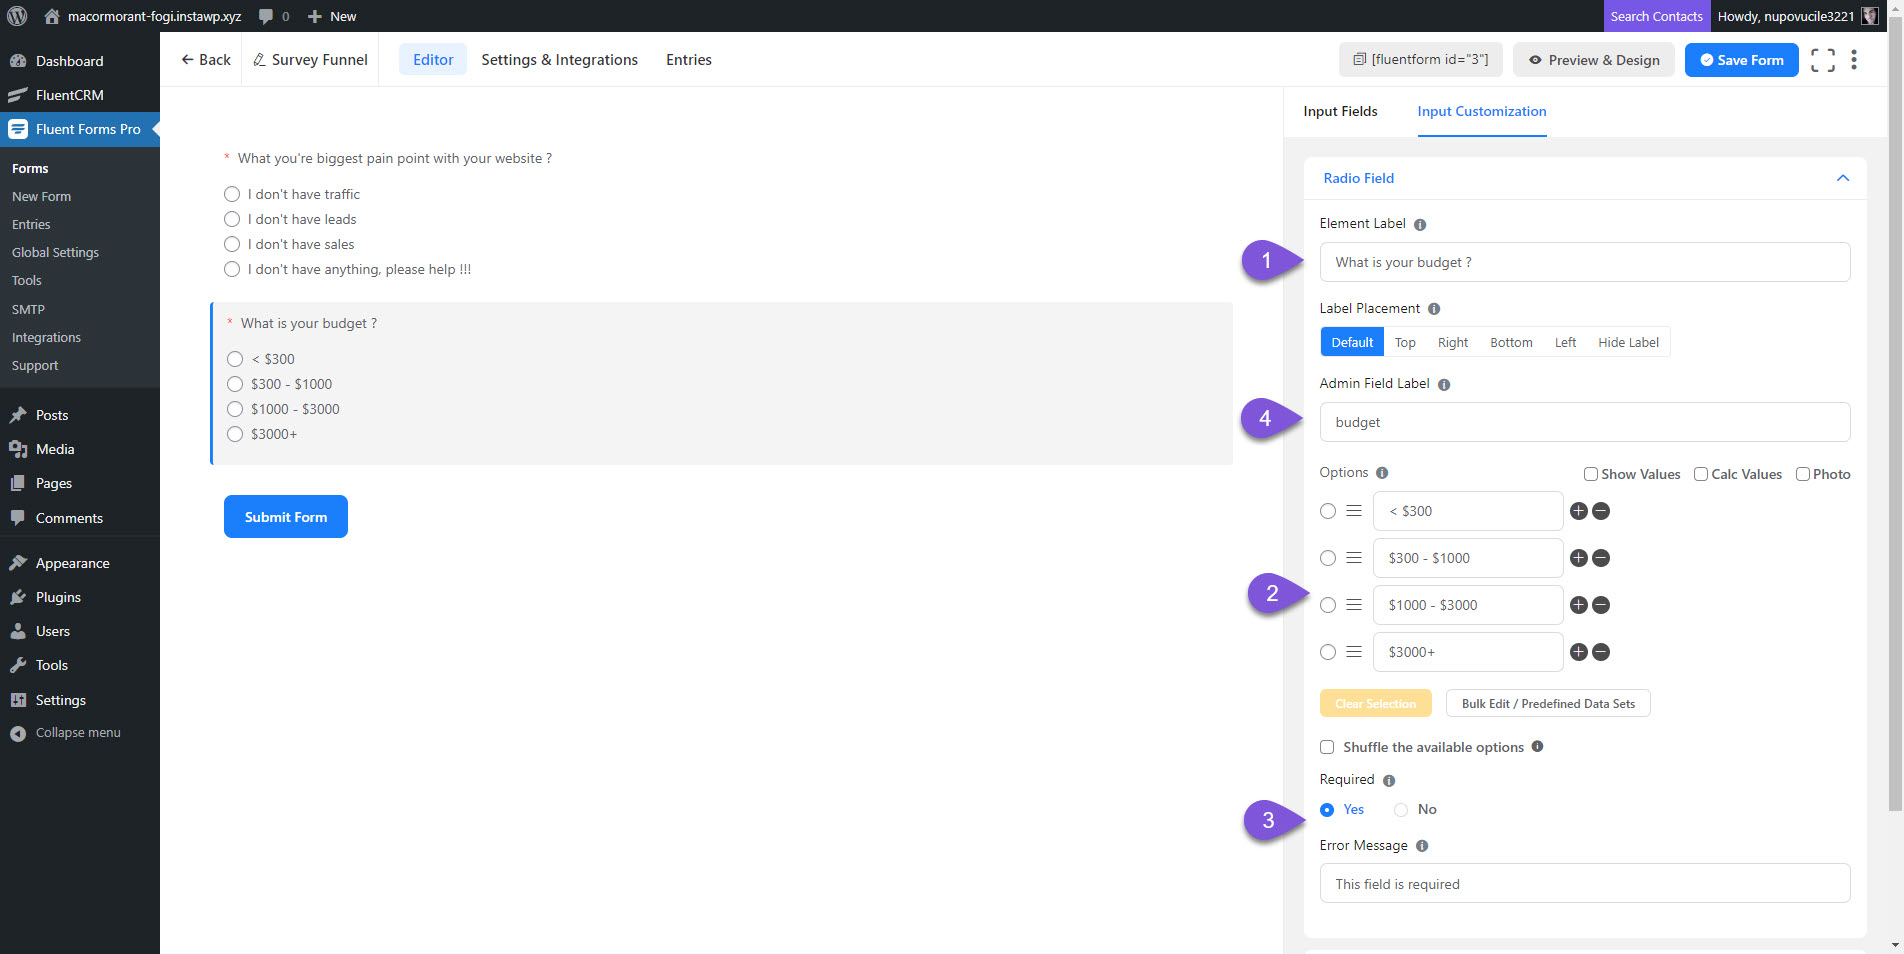
I create a second radio field to ask about the budget of the visitor. Some comments about this field:
- Here is the label of the field. It is what people will see, so your question goes here
- Here are the options you want to display
- Make the field required or not. In our case, it must be.
- You can place an admin field label, to recognize your field easily on other parts of your admin.
In this example, I create only 2 questions, but feel free to ask more, because this is a survey.
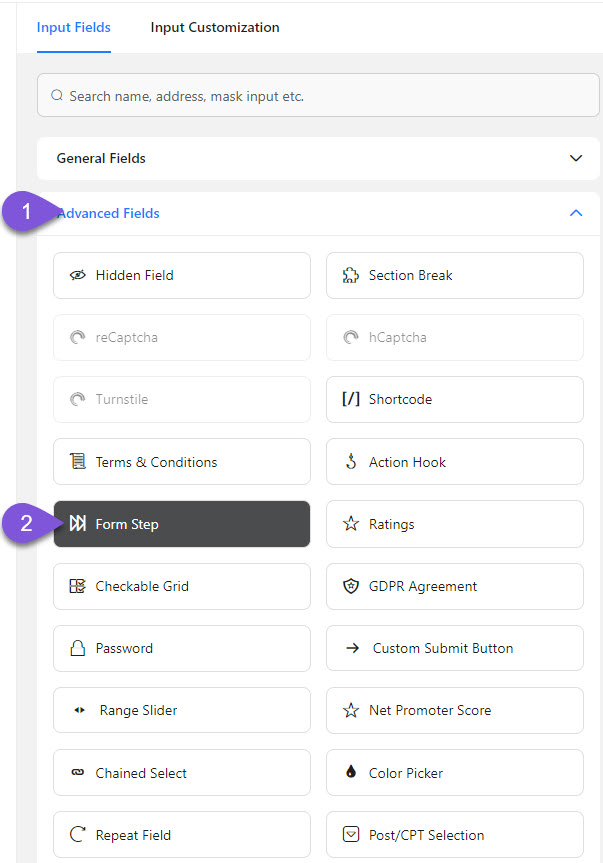
To not discourage people to fill in my questions, I decide to create a “Form Step”, to separate the questions and the email fields.
You’ll find the “Form Step” in the Advanced fields part.
So of course, I ask for the name of the visitor. In this case, this is the First name and Last name, both required. In Fluent Forms, this option is a little bit hidden. You’ll find it under each part of the field.
- Click the field to open the details on the right
- Click the arrow of “First name”
- You’ll find the “Required” part here
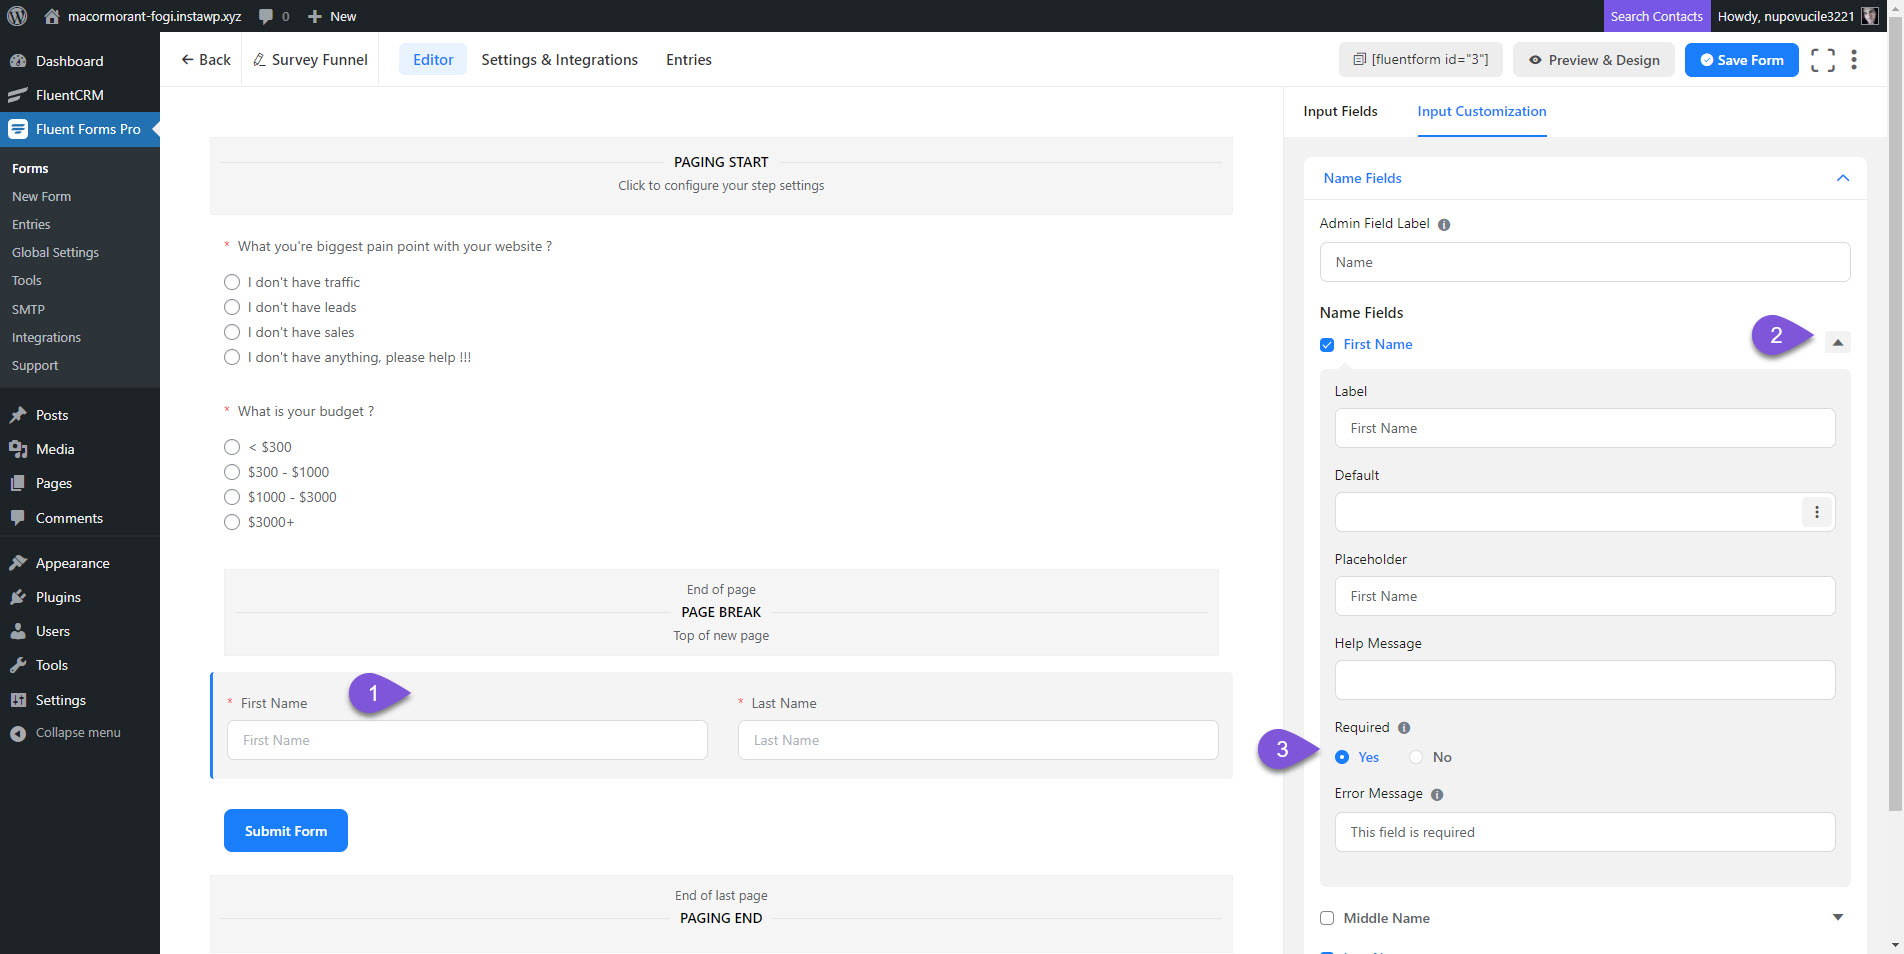
I add the email address field, which is absolutely mandatory too.
Now we have all our fields, let’s create the integration to connect the form to Fluent CRM.
3. Create the FluentCRM integration
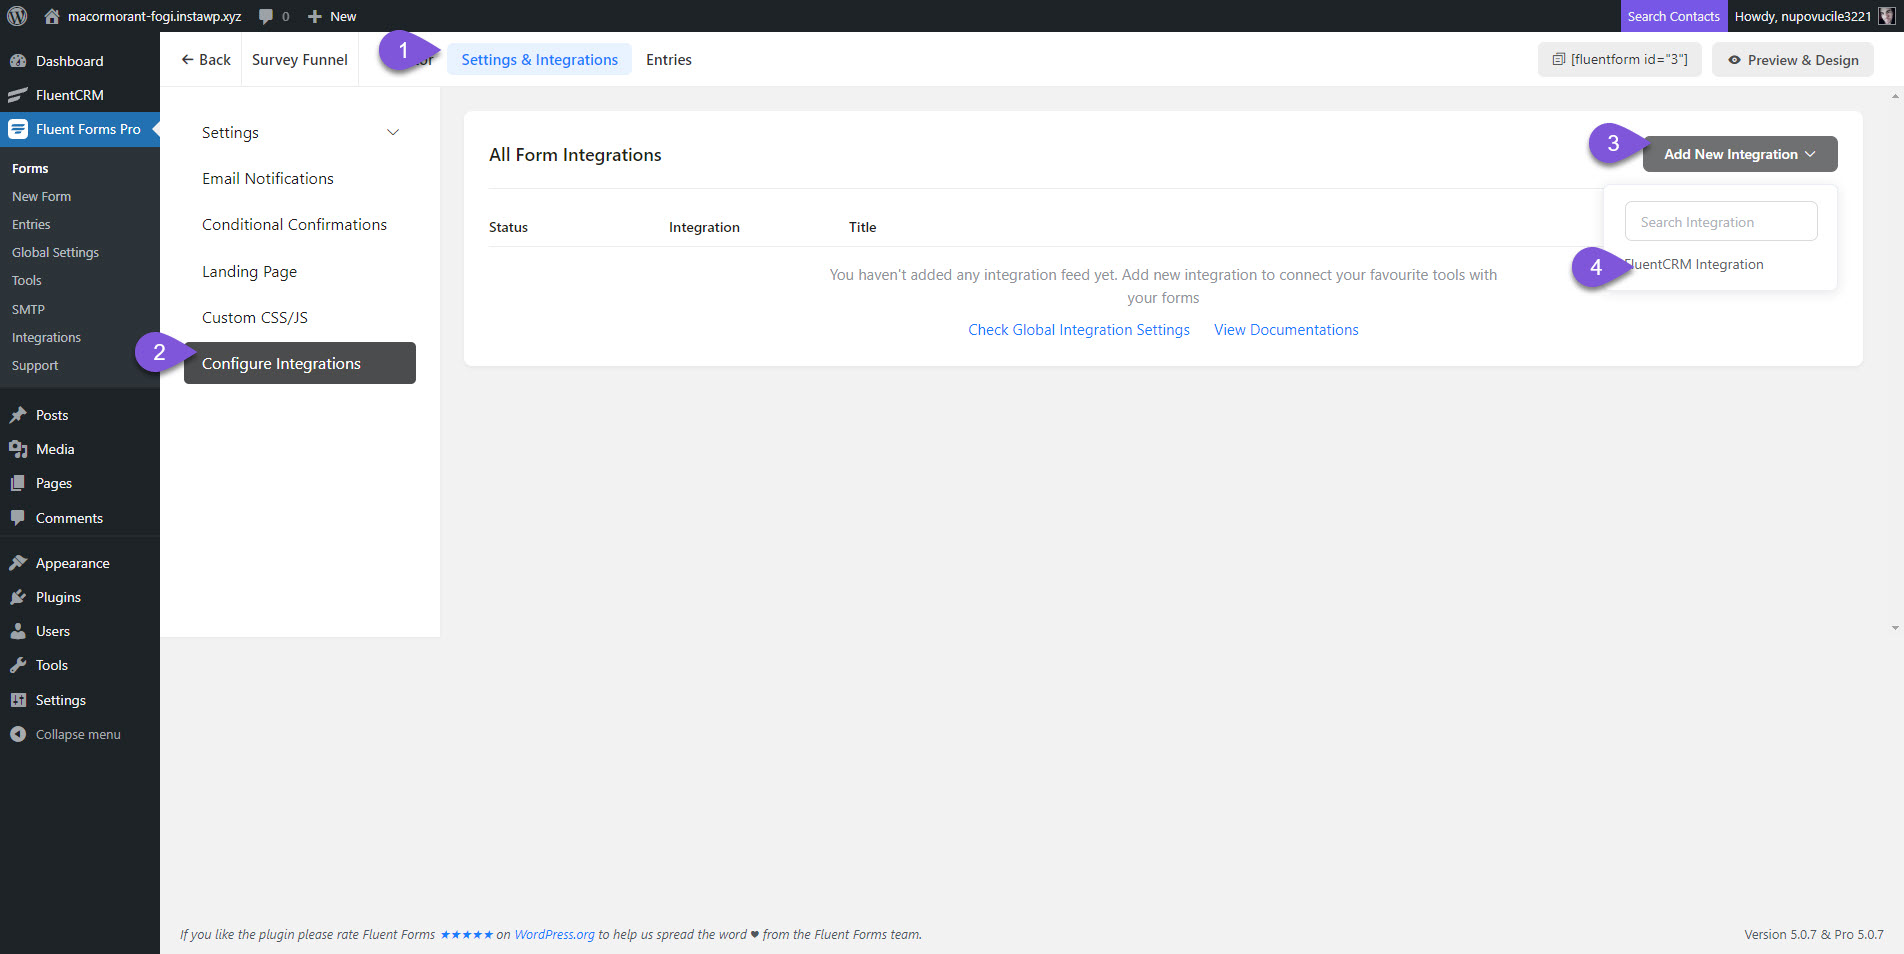
To create a connection between our form and our lists, we have to go into the form settings and integrations. To do that :
- Click “Settings & integrations” on the top of the page
- “Configure integrations” on the left menu
- Click the “Add New Integration” button on the right
- Click the “FluentCRM integration” menu item. This direct item only appears if you have FluentCRM installed on your website.
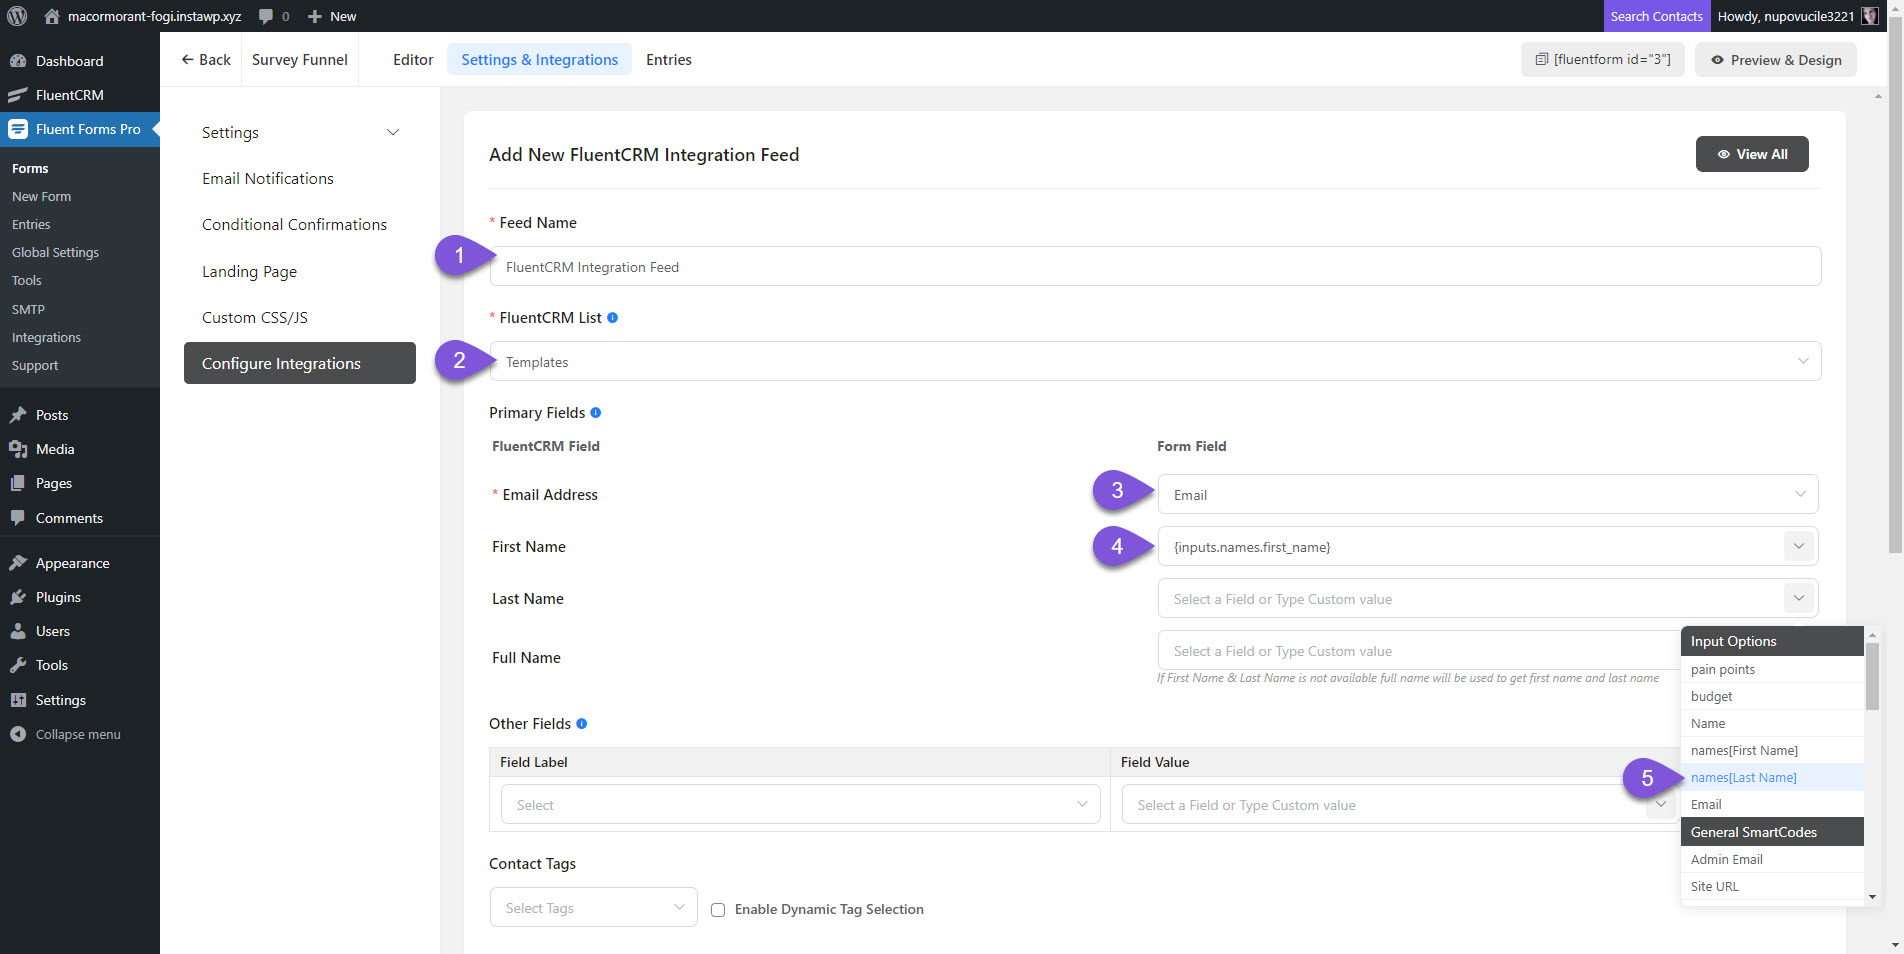
So now, we will create a “Feed” between Fluent Forms and FluentCRM. This feed will synchronize different fields that we will setup here.
- Enter the Feed name. You can leave it by default, but in our case, we will change it because we will have 3 different feeds, so we have to recognize them.
- I enter the FluentCRM list that I want to populate through this feed. I actually choose to populate the “Templates” list I created previoulsy
- I define the “Email” field to sync to FluentCRM
- I do the same with the “First name” field, that I find under “names[First Name]”
- The same with the Last name
Here is the subtlety. We don’t want everybody to populate this list, but only people with the lowest budget. So you have to enable the conditional logic of the feed. Here, if the field “Budget” equals the value “< $300”, then the feed will be fired. If it does not match with this value, the feed won’t be fired. As you can see, I told you it wasn’t a good idea to place special characters in the labels of my field options.

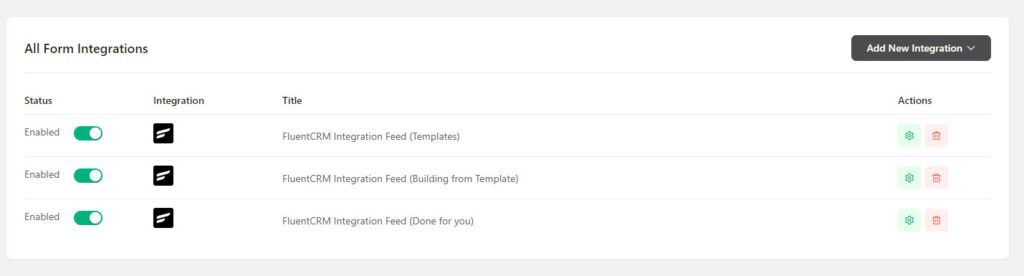
So I do the exact same step for the next feed, to populate the second list :
- Feed name : FluentCRM Integration Feed (Building from Template)
- FluentCRM List : “Building from template”
- I define the 3 fields (email, first name and last name)
- I enable the conditional logic, with the field “budget” equals “$300 – $1000”

You guess, this will be exactly the same for the last feed, except for one detail: We still have 2 different values in the form, and we have to make them match with the last list in FluentCRM.
As you can see, we have now 2 different lines in the Condition Logic part :
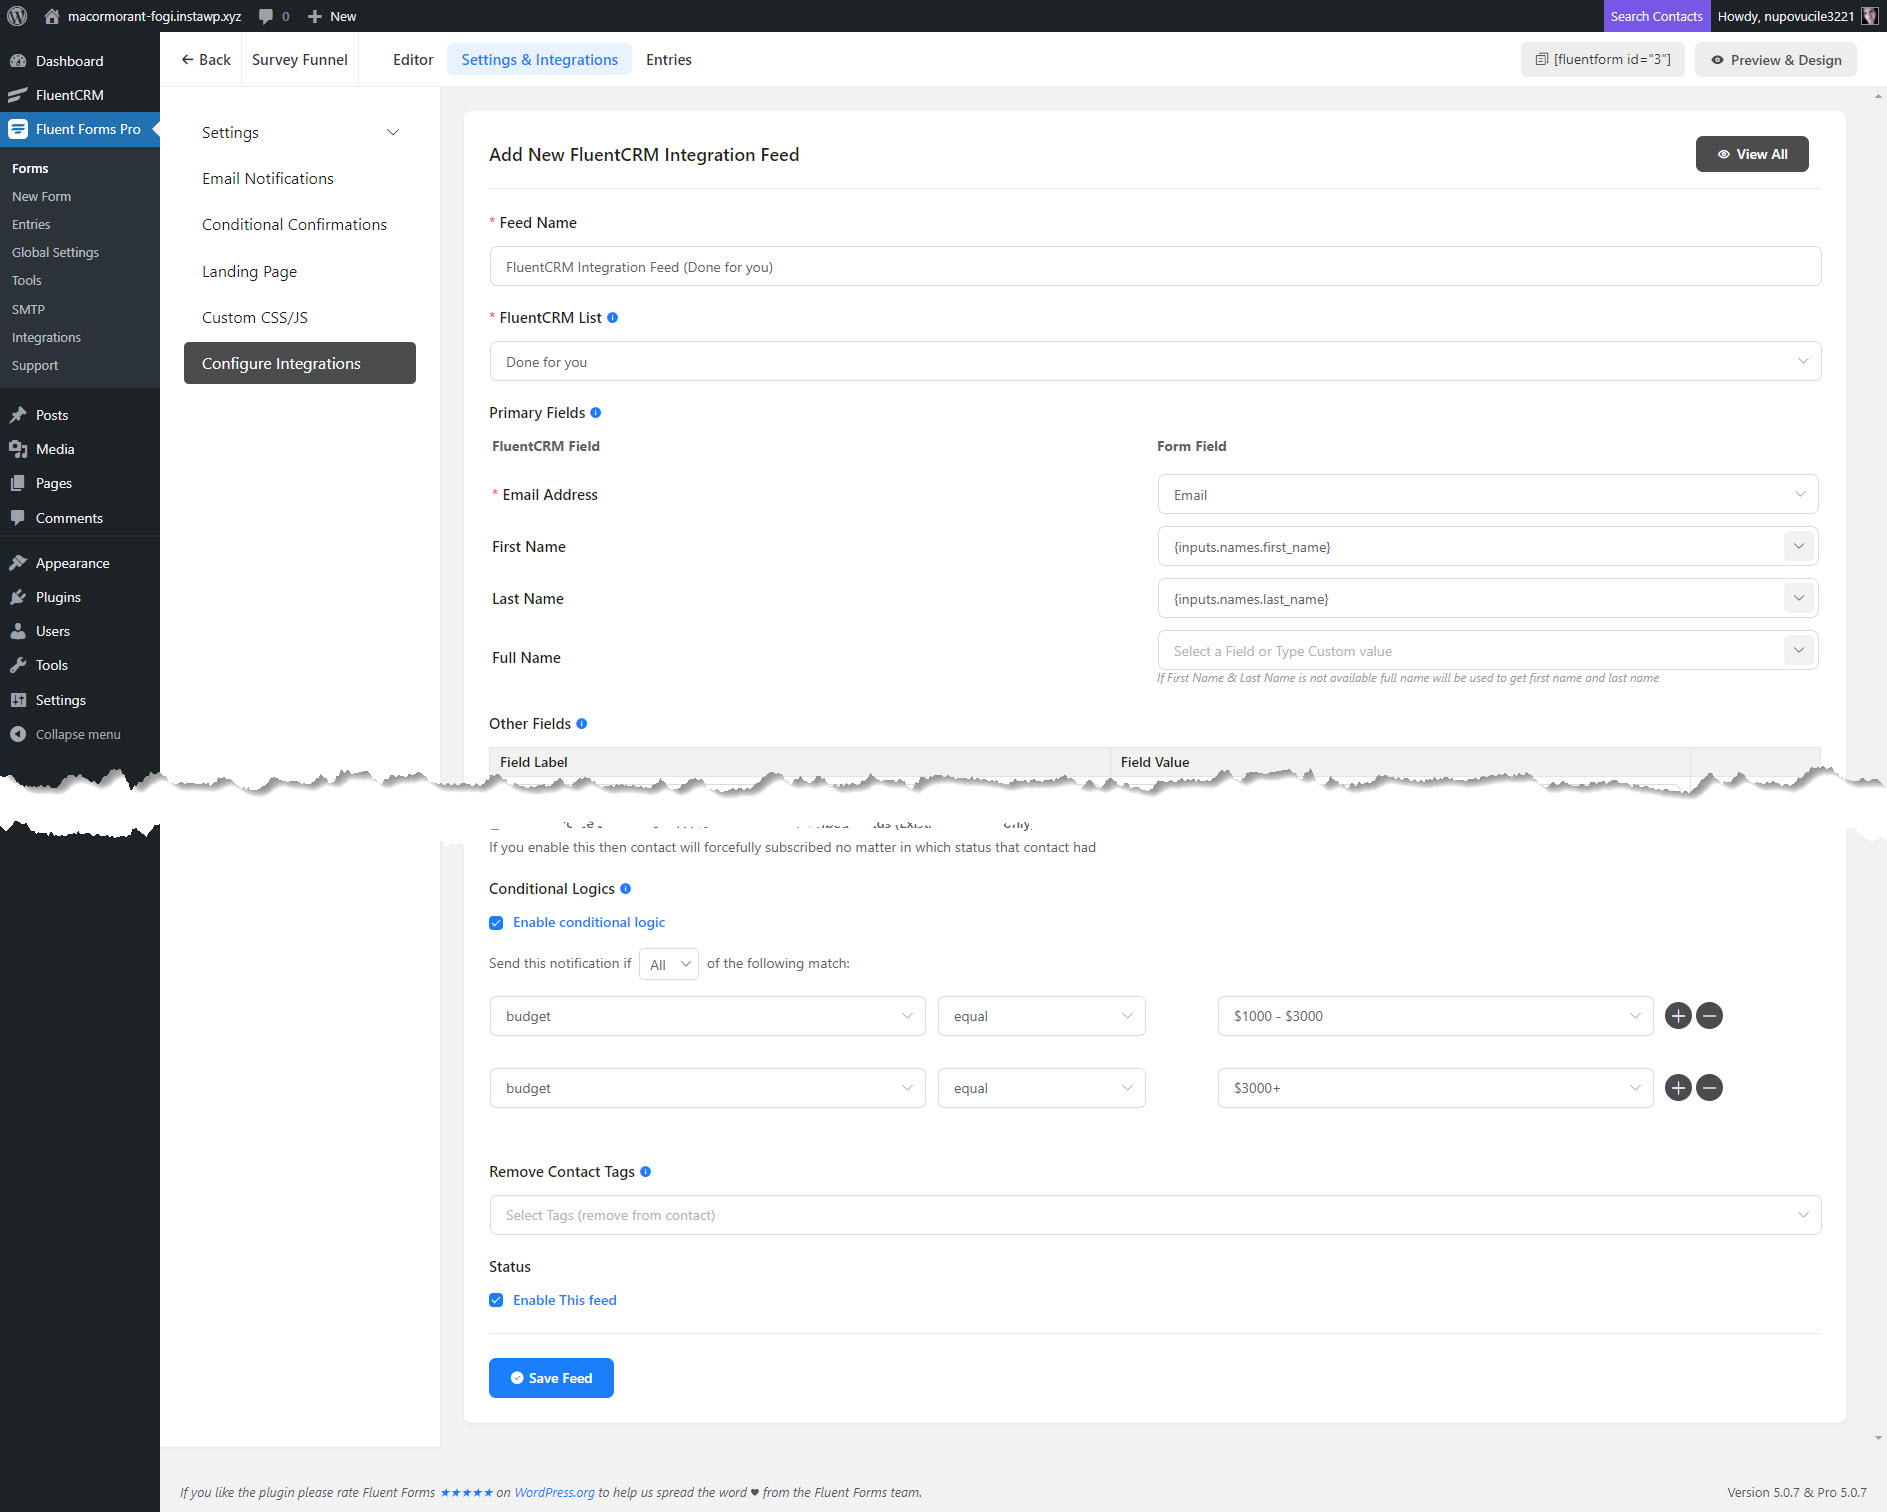
Here is the detail :
- The budget is obviously the field to match the condition
- Equals is the operator to use
- The option “$1000 – $3000” for the first line
- Click the “+” button at the end of the line to add another condition
- Do the same condition, but with the last option “$3000+”
- Do not forget to choose “Any” instead of “All”

Difference between “Any” and “All” :
- If you choose “All”, both conditions will be needed to fire the feed. In our case, the options “$1000 – $3000” AND “$3000+” would be used at the same time, so it doesn’t make sense at all, as we can choose only one option.
- If you choose “Any”, only one option is required to fire the feed, so it is what we need here.
So, finally, from our form, we can then collect users’ information and connect this information to our email lists.
Final thoughts
Building a Survey Funnel is really interesting for your business because you can simply ASK your visitors what they need, or what are their pain points, and then display the right message for them, according to their answers. This can be incredibly powerful. And the best part is that you can completely automate the process, from asking questions to sending emails that resonate with your audience.
You can go further by directing respondents to a specific page, based on their answers in the form. By doing this, you’ll have a complete Survey Funnel that will collect leads, increase customer engagement, and even display your best offers to the right people.
